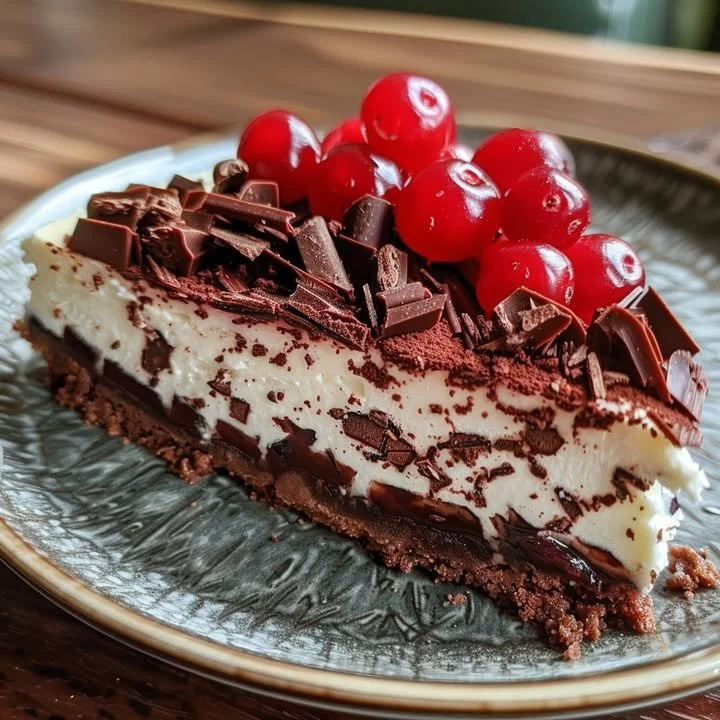
Black Forest Cheesecake
Indulging in a slice of Black Forest Cheesecake takes you on a sensory journey, where the rich, creamy texture meets the tart sweetness of cherries and the deep flavor of chocolate. This recipe is not only a visual delight but also a nostalgic crowd-pleaser, making it perfect for family gatherings, celebrations, or a cozy night in. With its easy preparation and comforting flavors, this cheesecake is bound to become a favorite among your loved ones. Let’s walk you through the step-by-step process to create this stunning dessert that combines the best of classic cheesecake with the enchanting essence of the beloved Black Forest cake.
Why You’ll Love This Recipe
The appeal of this Black Forest Cheesecake lies in its simple preparation, which is so straightforward that even novice bakers can succeed. With minimal ingredients, you can create a luxurious dessert that features a vibrant cherry topping and a smooth, fluffy filling. This recipe is also a wonderful crowd-pleaser, impressing both chocolate lovers and fruit enthusiasts alike. It’s a fantastic choice for special occasions, delivering that “wow” factor without complicated steps. Plus, the satisfaction of making your cheesecake from scratch is surely worth the effort!
Ingredients
When making the perfect Black Forest Cheesecake, it’s essential to gather high-quality ingredients that contribute to its delightful flavor:
1 1/2 cups chocolate cookie crumbs
Using chocolate cookie crumbs adds a rich, decadent base that complements the cheesecake.1/4 cup granulated sugar
Sweetening the crust adds a pleasant contrast to the creamy layers.1/3 cup unsalted butter, melted
This brings everything together, giving the crust a luscious texture.24 oz cream cheese, softened
The star of the show, smooth cream cheese creates that classic rich flavor.1 cup granulated sugar
Balances sweetness in the cheesecake filling perfectly.1 teaspoon vanilla extract
Adds a warm aroma, elevating the overall taste experience.1 cup heavy cream, whipped
Lightens the filling, creating a fluffy consistency that melts in your mouth.2 cups canned or jarred cherries, drained
Juicy cherries lend a vibrant flavor and a pop of color on top.1/4 cup granulated sugar
Used in the cherry filling for that delicious sweetness.1 tablespoon cornstarch
This thickens the cherry sauce, giving it the perfect consistency.1/4 cup water
Helps in cooking the cherry filling to amalgamate the flavors.Chocolate shavings or curls for garnish
Adds a decorative touch and an extra layer of chocolatey goodness.Whipped cream for garnish
This fluffy topping makes everything feel even more indulgent.Maraschino cherries for garnish
A delightful burst of sweet flavor to finish your masterpiece.
Step-by-Step Directions
Creating your Black Forest Cheesecake is as simple as following these easy steps:
Prepare the crust: In a medium bowl, mix together the chocolate cookie crumbs, granulated sugar, and melted butter until well combined. Press this mixture firmly into the bottom of a 9-inch springform pan to create a solid base.
Make the filling: In a large bowl, beat the softened cream cheese until smooth. Add in the granulated sugar and vanilla extract, mixing until everything is well blended and creamy.
Fold in the whipped cream: Gently fold in the whipped heavy cream to the cream cheese mixture until it becomes smooth and fluffy. This addition is what will give your cheesecake its lightness.
Spread the filling: Carefully pour the cream cheese filling over the prepared crust, using a spatula to spread it evenly.
Refrigerate: Cover the cheesecake and refrigerate it for at least 4 hours, or until it has set completely. This chilling time is crucial for firming up the cheesecake.
Prepare the cherry topping: For the cherry filling, combine the drained cherries, granulated sugar, cornstarch, and water in a saucepan. Cook over medium heat, stirring constantly, until the mixture thickens and becomes bubbly. Remove it from heat and let it cool down.
Assemble the cheesecake: Once the cheesecake has set, spread the cooled cherry filling evenly over the top of the cheesecake.
Garnish and serve: Before serving, add a sprinkle of chocolate shavings or curls, a dollop of whipped cream, and top with maraschino cherries for that beautiful finishing touch.
Tips & Tricks
To take your Black Forest Cheesecake even further, consider these helpful tips:
Room Temperature Ingredients: Ensure your cream cheese is at room temperature before mixing. It helps achieve a smooth, lump-free filling.
Chill Overnight: For an even better flavor and texture, chill the cheesecake overnight if time allows. This additional time allows the flavors to meld beautifully.
Fresh Cherries: If it’s cherry season, you can substitute canned cherries with fresh ones. Just pit and slice them, and use the same cooking method.
Add Layers: For a unique twist, consider adding a layer of chocolate ganache or additional whipped cream between the cheesecake filling and the cherry topping.
Serving Suggestions & Pairings
The Black Forest Cheesecake is perfect for various occasions, from birthday parties to holiday dinners. To serve it, consider pairing slices with a cappuccino or a glass of sparkling water for a delightful contrast. For added extravagance, serve it alongside a scoop of vanilla or cherry ice cream. This combination enhances the dessert’s flavor profile and adds a refreshing note.
Nutritional Information
Each slice of Black Forest Cheesecake delivers approximately 350 calories, depending on the size and specific ingredients used. It includes essential nutrients like calcium and protein from the cream cheese and some fiber from the cherries. Enjoy this decadent dessert in moderation as part of a balanced diet.
Storing Tips & Variations
To keep your Black Forest Cheesecake fresh, store it in the refrigerator, well-covered, for up to 5 days. It can also be frozen for up to 2 months if you want to indulge in a slice later. To reheat, let it thaw in the fridge before serving.
For variations, consider:
Swapping Flavors: Experiment with different fruits like strawberries or raspberries for a unique twist on the dessert.
Chocolate Variants: You might even incorporate a layer of chocolate ganache for an even richer chocolate flavor.
No-Bake Option: If you prefer a no-bake version, you can substitute gelatin for the setting time, though the texture will slightly change.
Conclusion
The Black Forest Cheesecake is not just a dessert; it’s a travel back to fond memories filled with delicious flavors and heartwarming moments. This step-by-step recipe invites you to create this alluring treat in your kitchen, and I encourage you to give it a try! Once you have baked this delightful cheesecake, take a moment to savor the experience, and don’t forget to share your thoughts and pictures with me!
FAQs
Can I use low-fat cream cheese for this recipe?
Yes, low-fat cream cheese can be used, but it may result in a less creamy texture.What if I can’t find chocolate cookie crumbs?
You can easily make your own by crushing chocolate cookies in a food processor or using graham cracker crumbs mixed with cocoa powder.How do I know when the cheesecake is set?
The cheesecake should be firm to the touch but have a slight jiggle in the center when you gently shake it.Can I make this cheesecake in advance?
Absolutely! This cheesecake is perfect for making in advance. It can be made a day or two ahead and stored in the fridge until ready to serve.How can I make the cheesecake gluten-free?
Simply use gluten-free chocolate cookies to create the crust, ensuring the entire cheesecake is suitable for a gluten-free diet.
Black Forest Cheesecake
Ingredients
For the Crust
- 1.5 cups chocolate cookie crumbs Using chocolate cookie crumbs adds a rich base.
- 0.25 cups granulated sugar Sweetens the crust.
- 0.33 cups unsalted butter, melted Brings the crust together.
For the Filling
- 24 oz cream cheese, softened The star ingredient for a rich flavor.
- 1 cups granulated sugar Balances the sweetness.
- 1 tsp vanilla extract Adds aroma and flavor.
- 1 cup heavy cream, whipped Creates a light, fluffy texture.
For the Cherry Topping
- 2 cups canned or jarred cherries, drained Provides a vibrant topping.
- 0.25 cups granulated sugar Sweetens the cherry filling.
- 1 tbsp cornstarch Thickens the cherry sauce.
- 0.25 cups water Used for cooking the cherry filling.
For Garnish
- Chocolate shavings or curls For decoration.
- Whipped cream Makes the dessert more indulgent.
- Maraschino cherries Adds a burst of sweetness.
Instructions
Preparation
- In a medium bowl, mix together the chocolate cookie crumbs, granulated sugar, and melted butter until well combined. Press this mixture firmly into the bottom of a 9-inch springform pan.
- In a large bowl, beat the softened cream cheese until smooth. Add in the granulated sugar and vanilla extract, mixing until everything is well blended.
- Gently fold in the whipped heavy cream to the cream cheese mixture until it becomes smooth and fluffy.
- Pour the cream cheese filling over the prepared crust, spreading it evenly with a spatula.
- Cover the cheesecake and refrigerate for at least 4 hours or until set completely.
Cherry Topping
- In a saucepan, combine the drained cherries, granulated sugar, cornstarch, and water. Cook over medium heat, stirring constantly, until the mixture thickens.
- Remove from heat and let it cool down.
Assembly and Serving
- Spread the cooled cherry filling evenly over the top of the cheesecake.
- Add a sprinkle of chocolate shavings or curls, a dollop of whipped cream, and top with maraschino cherries before serving.